Step-by-step guide
Users, Roles & Permissions in AiWeapX POS
Give each staff member only the access they need. This makes the POS easier to manage and helps protect sensitive functions.
On this page1. View system users2. Add a system user3. Open roles and permissions4. Create a role5. Assign permissions6. Manage user actions
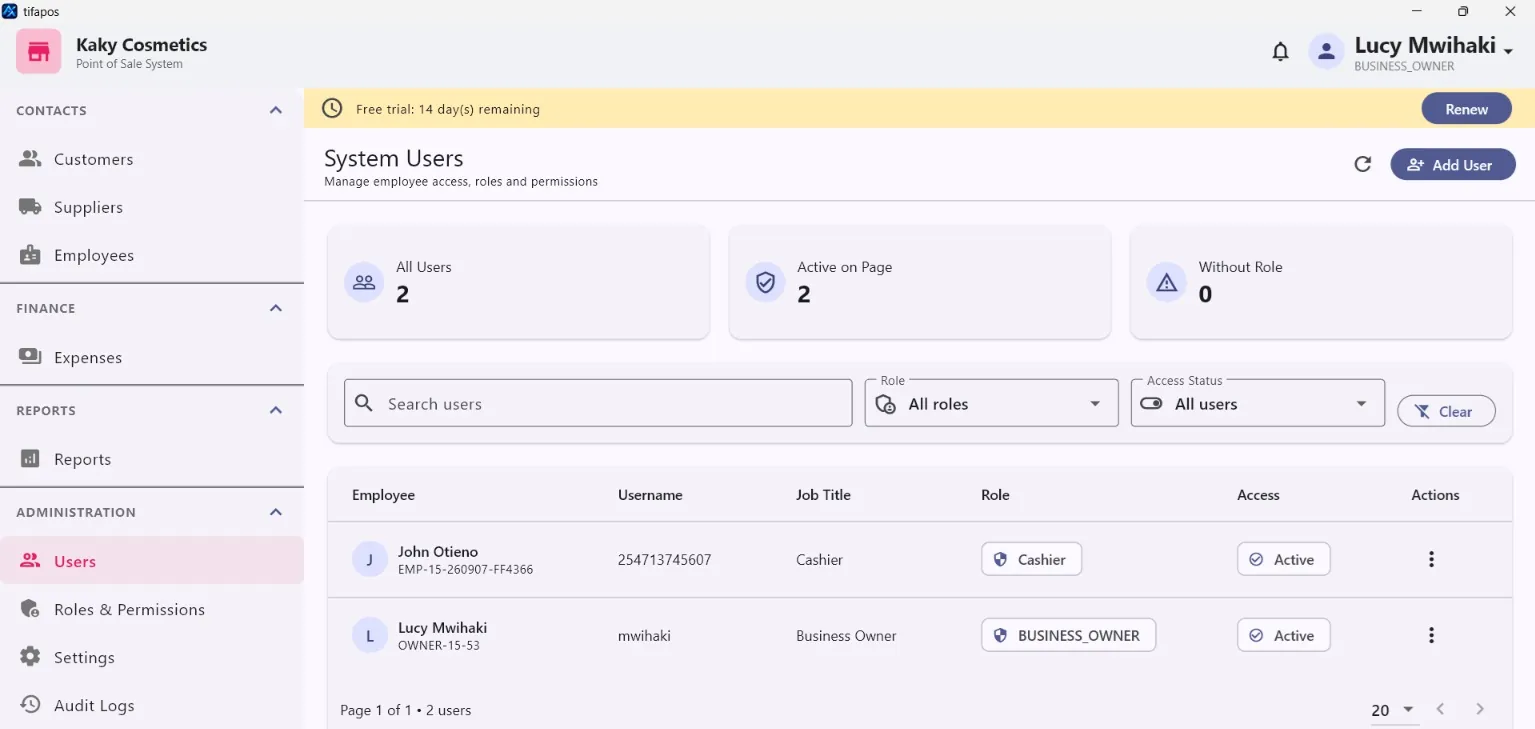
1. View system users
Open System Users.
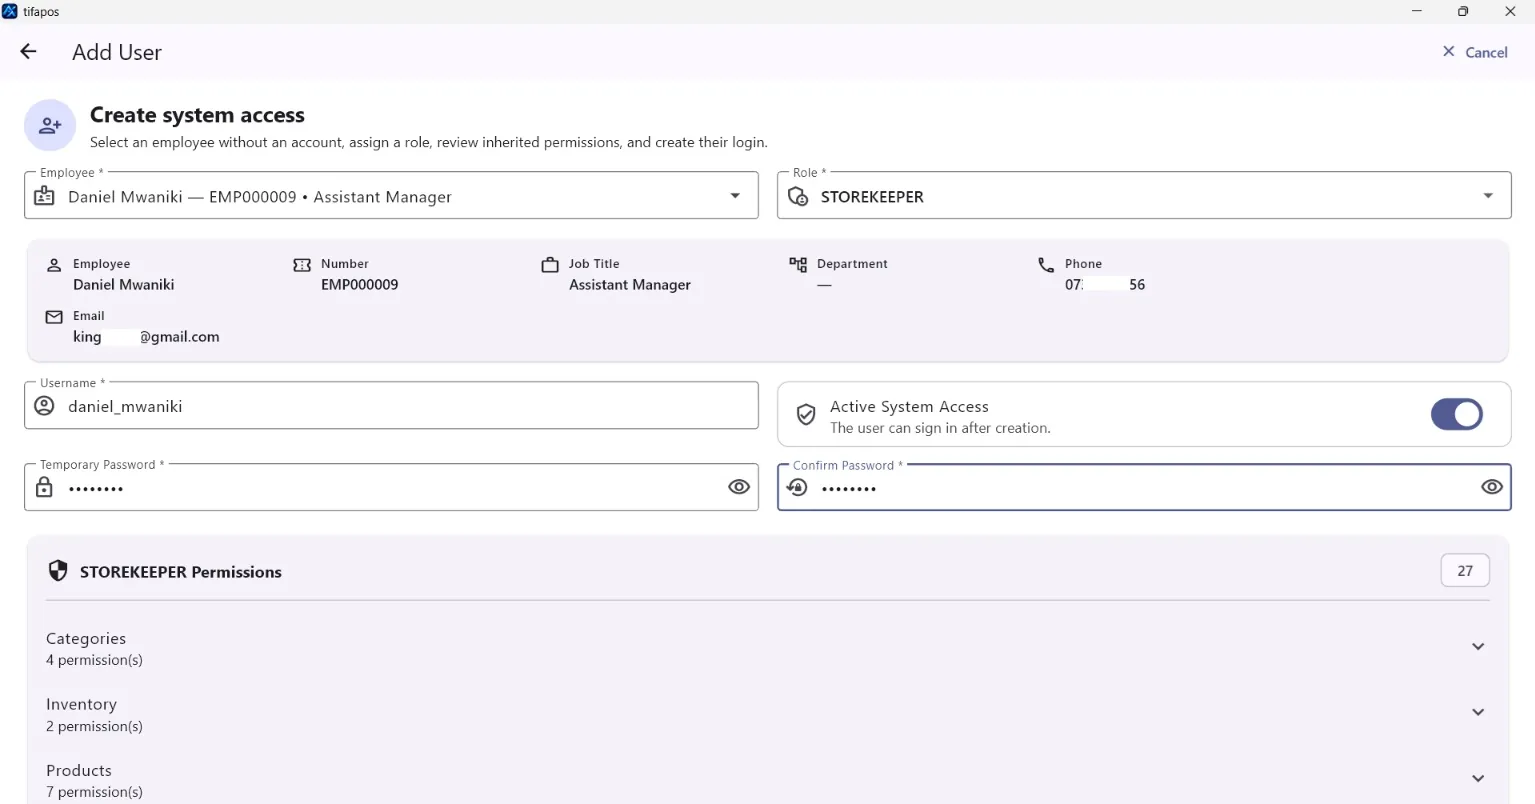
2. Add a system user
Click Add System User, select the employee and role, then create the account. Add System User.
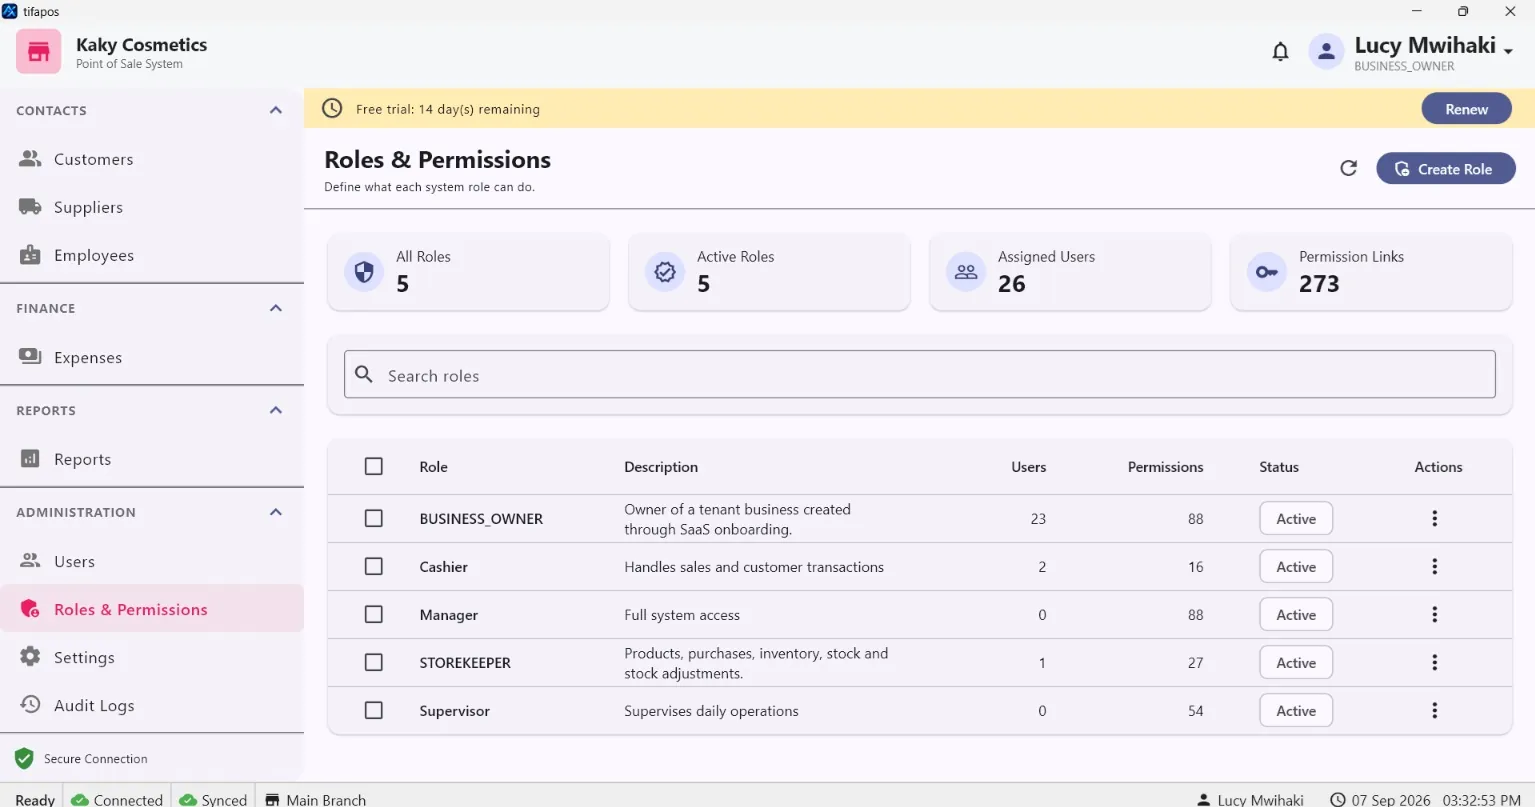
3. Open roles and permissions
Open Roles & Permissions.
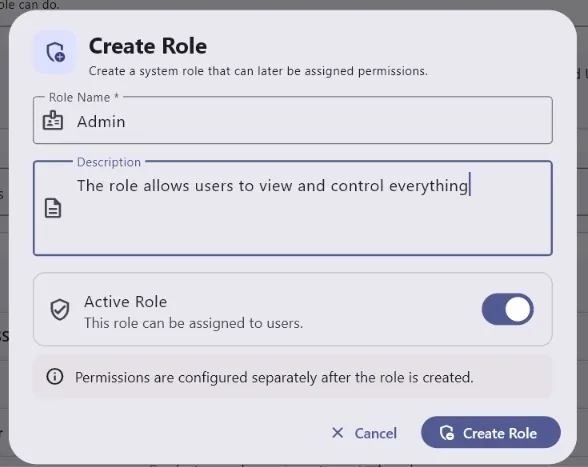
4. Create a role
Click Create Role, give the role a clear name and save it. Create Role.
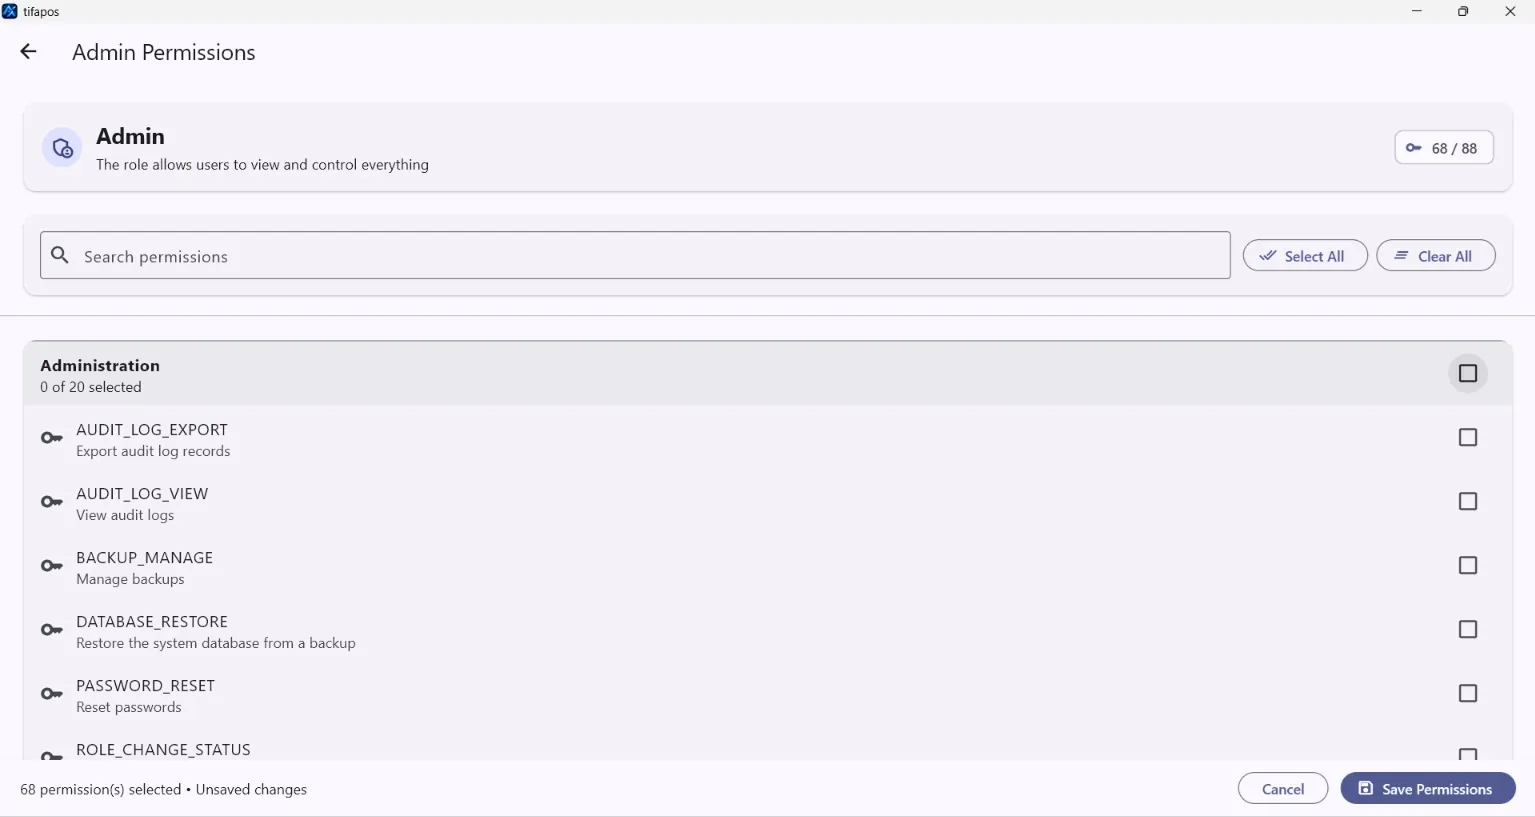
5. Assign permissions
Open the role, expand the permission groups and enable only the actions that role needs. Save Permissions.
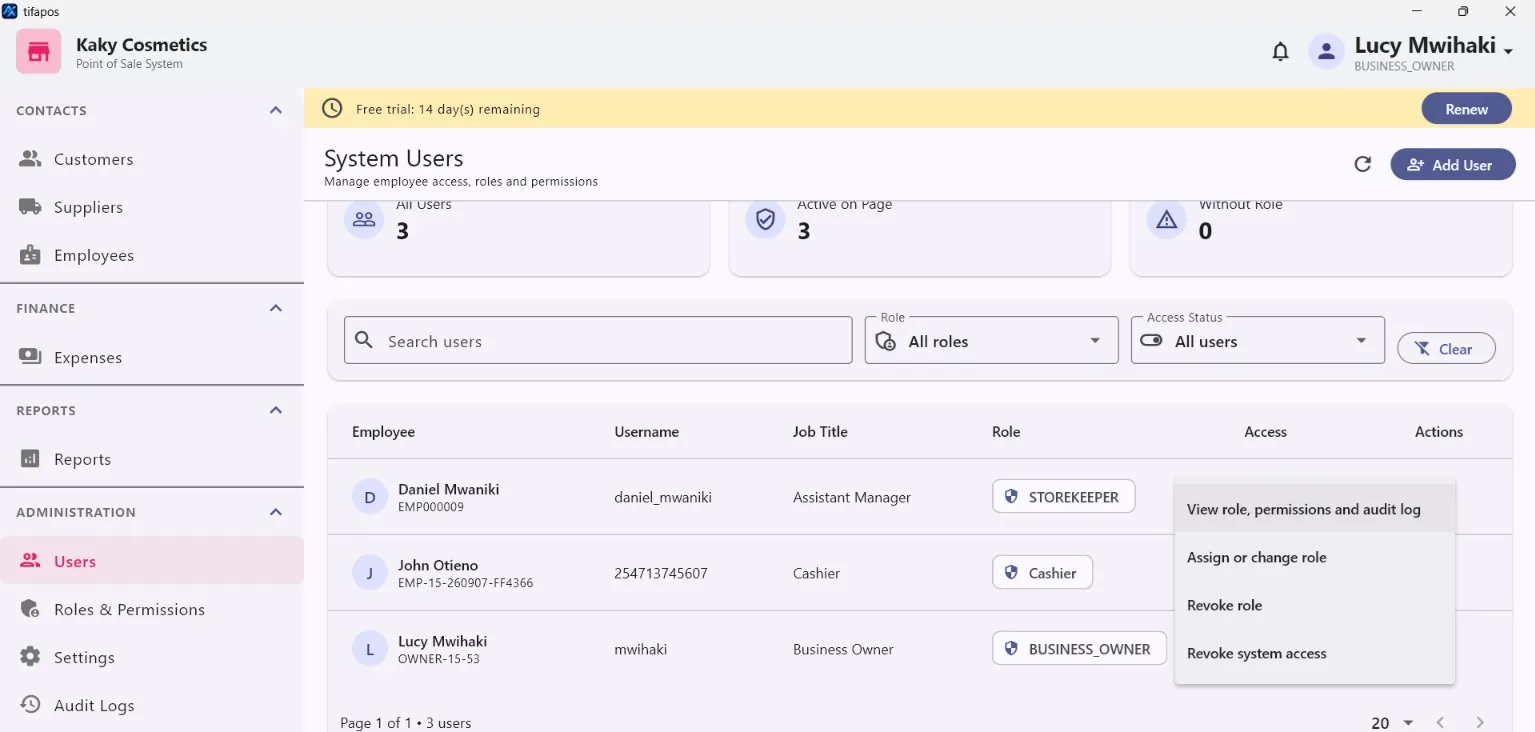
6. Manage user actions
Use the action buttons beside a user to manage their account or access.
Good practice: avoid giving every employee full administrative permissions. Give each role only the functions needed for that job.